
Custom XML mapping
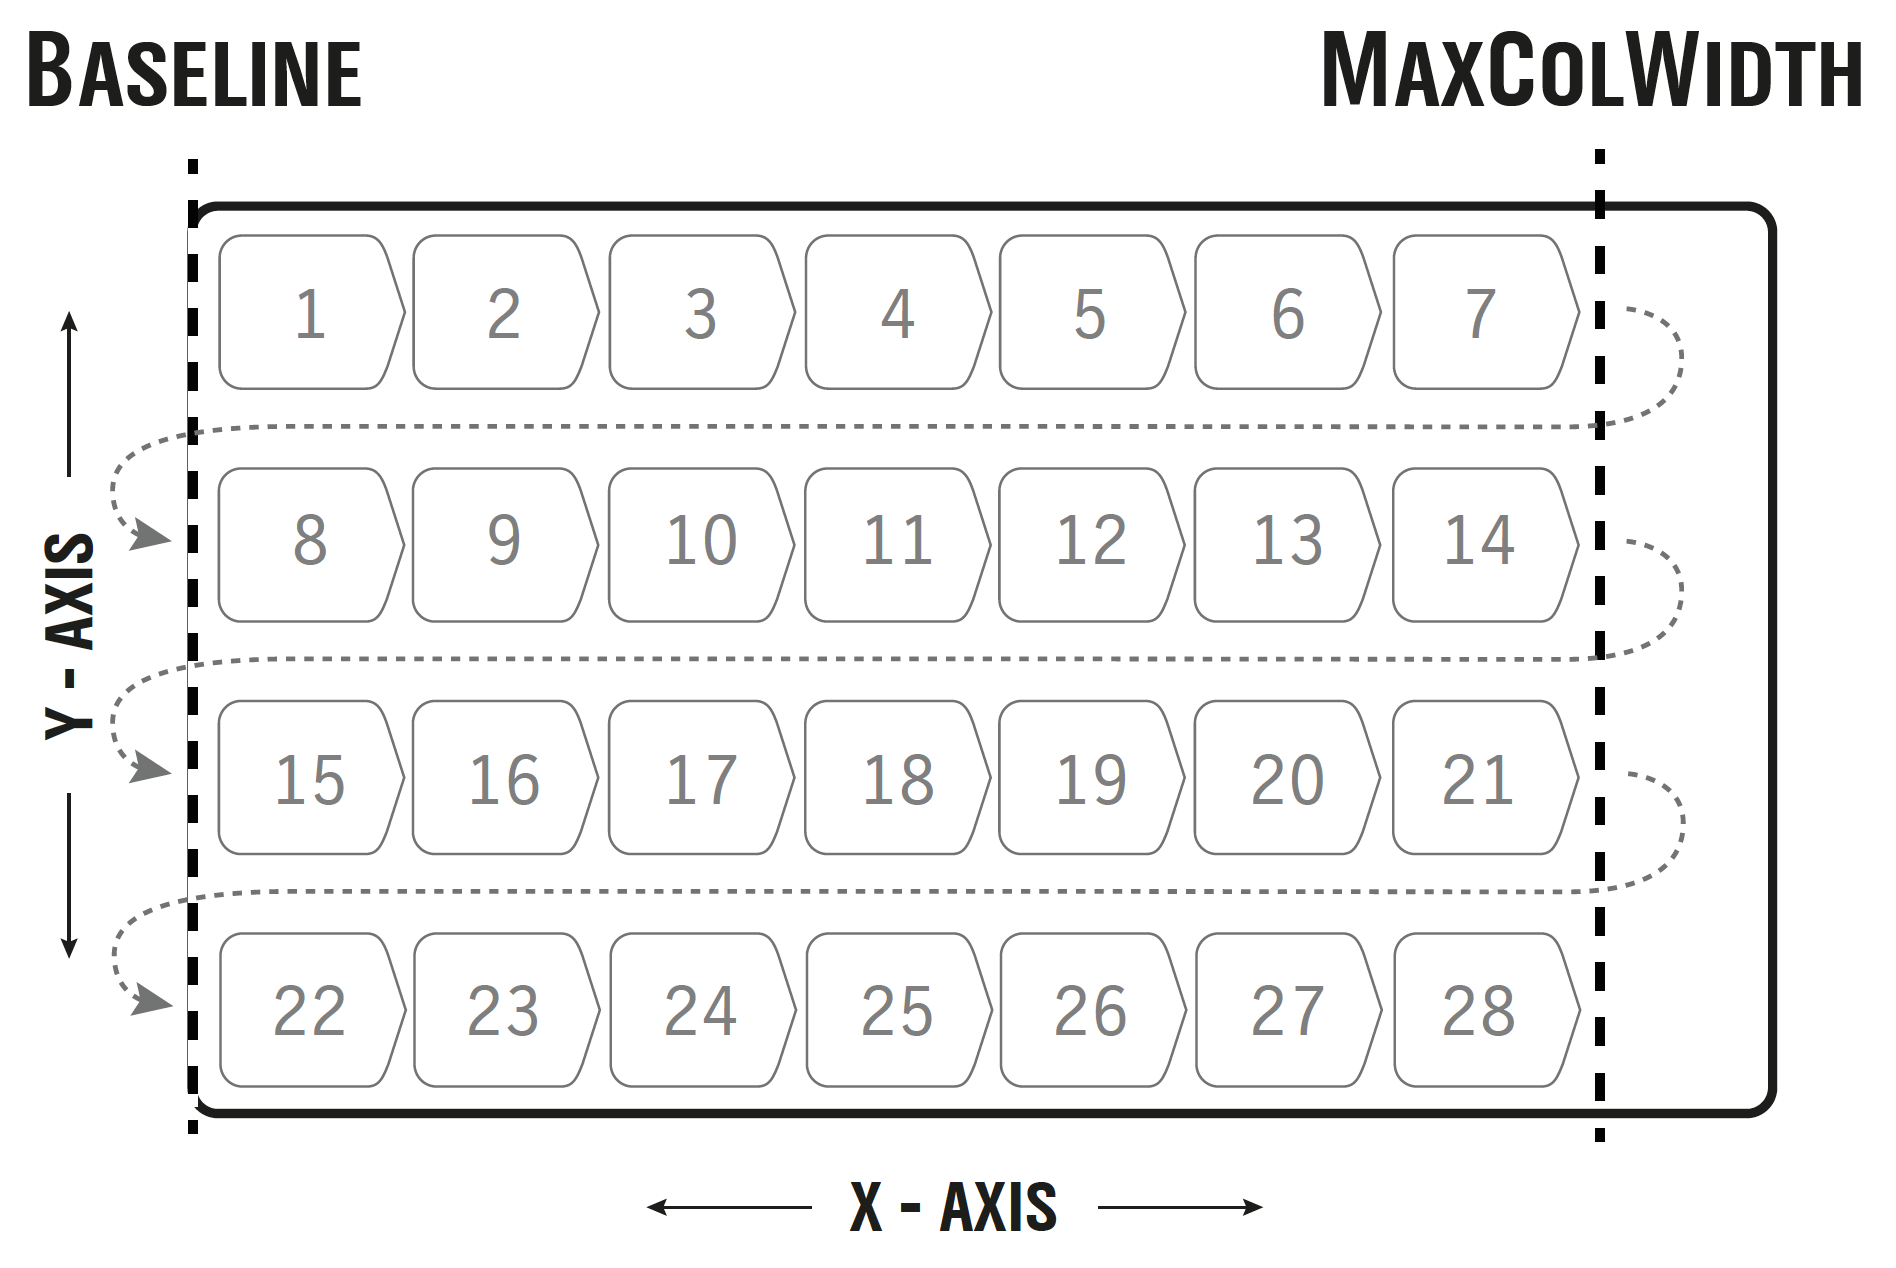
LEDVIZ normally calculates LED panel positions automatically. In a newly created file, the initial left position is X = 0. The right edge is limited by the calculated column width, stored as <MAXCOLWIDTH> in the XML file.
Additional XML tags let you reposition individual output areas and define where wrapping occurs.
Output across multiple screens
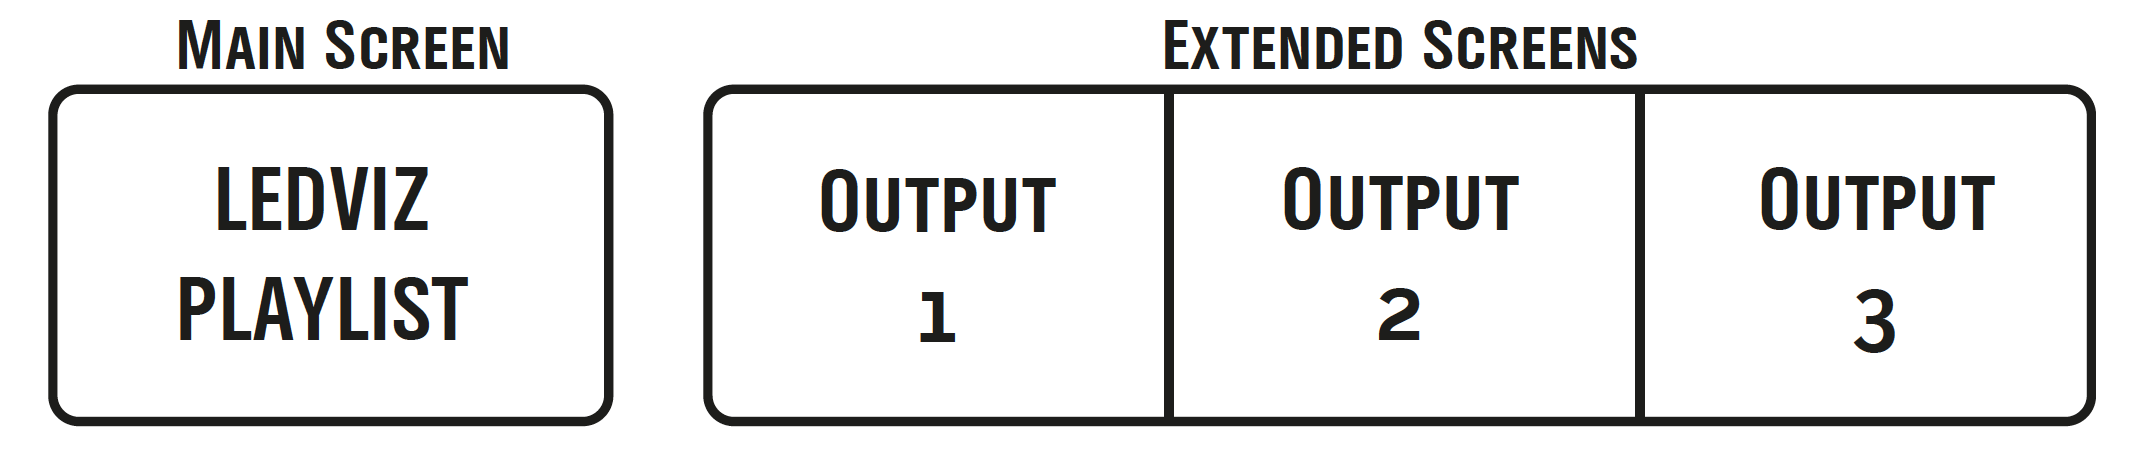
Section titled “Output across multiple screens”For a configuration with multiple screens, resize the output window to cover the required extended displays. Since output uses a single shared window, arrange the displays next to each other from left to right in Windows display settings.
The existing documentation lists Matrox TripleHead2Go and DualHead2Go as hardware options. These extenders increase the resolution of a graphics output and then split its signal into separate display signals.
If the graphics card has multiple outputs, you can also adjust the width and height of the LEDVIZ output window to cover the complete output area.
Reposition output areas
Section titled “Reposition output areas”An area normally starts immediately to the right of the preceding one. Its vertical position stays the same until a line break is needed. At a line break, the output moves down by its height and starts again at the left edge.
| XML tag | Function |
|---|---|
<POSX>?</POSX> |
Sets the area’s horizontal X position. |
<POSY>?</POSY> |
Sets the area’s vertical Y position. |
<BASEX>?</BASEX> |
Sets the left X starting position used after a line break. |
Tag spelling and following elements: XML tags must be uppercase. A changed area becomes the basis for subsequent position calculations. The next element starts to its right.
The right edge for wrapping is calculated as follows:
Right edge = BASEX + MAXCOLWIDTHChanging <BASEX> therefore also moves the right edge. You can change <BASEX> repeatedly within a configuration; there is no limit on the number of changes.
Wrap within an area
Section titled “Wrap within an area”To interrupt an output area and continue it elsewhere, define both the break and the new coordinates:
| XML tag | Function |
|---|---|
<BREAK>?</BREAK> |
Splits the area after the specified number of pixels. |
<BREAKX>?</BREAKX> |
Sets the new horizontal X position for the continuation. |
<BREAKY>?</BREAKY> |
Sets the new vertical Y position for the continuation. |
<BREAKBASEX>?</BREAKBASEX> |
Assigns a new <BASEX> value from the break onwards. |
<BREAK> alone does not define where output resumes. Also specify the required continuation coordinates.
Second and third breaks
Section titled “Second and third breaks”The following tags are documented for two further breaks:
| XML tag | Function |
|---|---|
<BREAK2>?</BREAK2> |
Second break after the specified number of pixels. |
<BREAK2X>?</BREAK2X> |
X position for continuation after the second break. |
<BREAK2Y>?</BREAK2Y> |
Y position for continuation after the second break. |
<BREAK3>?</BREAK3> |
Third break after the specified number of pixels. |
<BREAK3X>?</BREAK3X> |
X position for continuation after the third break. |
<BREAK3Y>?</BREAK3Y> |
Y position for continuation after the third break. |
Set a custom right edge
Section titled “Set a custom right edge”To make an area wrap before or after the standard boundary, use <MAXX>:
<MAXX>?</MAXX>This value applies only to the element containing it. All other areas continue to use the standard values from the XML file.
If an earlier break is needed without changing values such as <BASEX>, <MAXX> can often replace a simple <BREAK>. Prefer <MAXX> to <BREAK> where possible.
Special case: returning to X = 0 and Y = 0
Section titled “Special case: returning to X = 0 and Y = 0”Position tags with a value of 0 can be omitted. This creates a special case: explicitly returning to X = 0 and Y = 0 is not possible simply by setting all position tags to 0.
At least one of <POSX>, <POSY> or <BASEX> must be non-zero for LEDVIZ to process these position settings.
The documented workaround is to set <BASEX> to −1 and <POSX> to +1. For the following area, adjust the position again using the appropriate <POSX> value.
XML examples
Section titled “XML examples”Position an area
Section titled “Position an area”<SEGMENT1 id="1"> <POSX>1920</POSX> <POSY>0</POSY> <BASEX>1920</BASEX> <NAME>Panel 2</NAME> <WIDTH>1080</WIDTH> <HEIGHT>60</HEIGHT></SEGMENT1>Split an area after 512 pixels
Section titled “Split an area after 512 pixels”<SEGMENT4 id="4"> <BREAK>512</BREAK> <BREAKX>1920</BREAKX> <BREAKY>0</BREAKY> <BREAKBASEX>1920</BREAKBASEX> <NAME>Panel 5</NAME> <WIDTH>1080</WIDTH> <HEIGHT>60</HEIGHT></SEGMENT4>This reference is based on the existing LEDVIZ documentation. Some screenshots show an earlier application interface. Original documentation